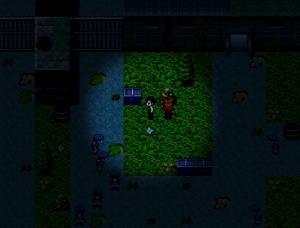
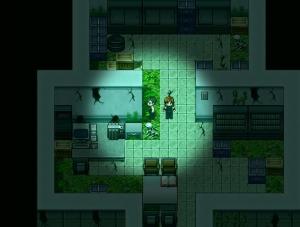
If there’s one thing you can always count on my email inbox to be full of, it’s SOS messages from people who are hopelessly stuck in the One Night games. With that in mind, I thought I’d do something about it and begin a series of blog posts containing walkthroughs and hints for each game — one per week for the next month — so that there’s finally a place where I can direct people to get help for all four games, easily accessible. Plus, with this blog rapidly degenerating to zombie status due to all the uni work I’ve been swamped with lately, it probably needs every bit of activity I can muster for it 🙂
So, without a length preamble, here’s the walkthrough for the first One Night. It’s mainly based on this old walkthrough on RPG Maker Network — though the one presented here is a more updated and streamlined version that reflects changes made in the game’s later revisions.
###
Bonus Modes: In version 5.1 and onwards of the game, you can access hidden game modes by entering certain codes as your name. Usually, these codes are given to you as rewards for completing the game, but if you don’t want to play again, here they all are.
EASYMODE – Allows you to begin with a handful supplies in your inventory. There will also be less monsters.
HARDMODE – Allows you to play a harder version of the game where there are more monsters and Defense Items cannot be found.
NEWDIGS – Unlocks an alternate outfit for the player character.
MOREFEAR – Enables Flash game style jump scares, which appear at random locations in the game.
The Prison
- Take the Rope from the floor and examine the open crate to force the door to open.
- Enter the mess hall (first door on the right) and take the Pickaxe from the kitchen.
- Use the Pickaxe to break down the door labelled “holding” in the north part of the corridor.
- Read the Guard’s Journal, then use the Rope to descend into the hole.
- Read the Handwritten Note, which will give you the number 38 as the unlock code for the box. Take the Prison Key from inside.
- Unlock the exit (furthest door down the corridor) with the Prison Key and proceed outside.
- Enter the small building to the southwest and read the Maintenance Report on the table. (note: you need to read this to trigger a scene further in the game)
- Go through the single door into the Warden’s office and take the Warden’s Key from the drawer in the top right corner.
- Return to the previous room and unlock the pipe gating with the Warden’s Key. You can now break the Iron Pipe off the wall.
- Go back outside and use the Iron Pipe to force open the door to the building to the east.
The Main Building
- Read the logbook on the reception counter and note the date for a later puzzle.
- Enter the door on the right hand side, behind the counter, and pass through the next room into the Archive Room.
- In the Archive Room, examine the bookcase in the top right corner and you’ll push it aside to reveal a hole in the wall. (note: you can only move the shelf if you’ve read the Maintenance Report)
- Climb through the hole into the Server Room and take the Main Building Key from the drawer.
- Return to the reception lobby and, this time, enter the door on the left.
- Ignore the first three doors in the corridor and enter the Locker Room through the third door on the northern side.
- In the Locker Room, read the Admin’s Memo to figure out how to unlock the locker. Take the Desk Key from the unlocked locker. (note: to unlock the locker, return to the Archive Room and examine the shelves. Each one is numbered, and also has a date listing. Note the shelf numbers and enter them into the locker’s combination lock in order of the dates, earliest, to latest)
- Return to the corridor and enter the very first door on the northern side.
- Use the Desk Key to unlock the desk and take the Power Conduit from inside. You now get to see a cutscene.
- Return to the corridor and unlock the next door on the northern side with the Main Building Key. (note: this door only becomes accessible after the previous cutscene)
- Enter the door to the right, and take the MHL-3 Base from the open crate inside.
- Return to the corridor and follow it to the end, entering the Pharmacy through the last door.
- Read the Chemistry Book to get instructions on how to mix the acid, then use the MHL-3 Base on the mixing set.
- Mix the correct amount of chemicals to get the MHL-3 Compound (note: you need to mix 144 litres, 99 litres and then 207 litres to get the correct composition)
- Place the MHL-3 Compound into the synthesiser for 360 seconds to create the MHL-3 Acid.
- Return to the room where you obtained the MHL-3 Base and use the MHL-3 Acid to burn through the metal crate. Take the Explosives from inside.
- Exit the Main Building and return to the Prison. Before entering, go follow the wall left past the door and go down the ladder at the side of the building.
- Take the Keycard from the crate at the end of the shaft.
- Return to the Prison and use the Explosives in the room where you received the Prison Key to access the underground.
The Underground
- Proceed through the dug out corridor until you emerge in the lower coridor. This is a large, ring shaped room with many doors leading off of it.
- Going clockwise through the room, enter the fourth door you come to.
- Read the Scientist’s Notes on the table and then take the Underground Key and exit the room.
- Continuing clockwise, unlock the second door you come to with the Underground Key and take the Startup Disk from the corpse.
- Unlock the next door with the Underground Key and read the Orders for a hint on how to unlock the closet. Take the Power Conduit from inside. (note: to unlock the closet, enter the words Make, Green and Red)
- Exit the room and go through the door directly opposite the one you just entered. Take another Power Conduit from the crate in the center of the room.
- Use the Underground Key to unlock the door in the northeastern corner of the corridor and enter the Power Room.
- Place the three Power Conduits into the generator and watch the triggered cutscene.
- Return to the Server Room in the Main Building and use the Startup Disk to turn on the mainframe. Enter the date from the logbook in the reception lobby as the password. (note: it’s 0707)
- The last remaining door in the Main Building corridor is now unlocked; go through it to emerge in the south corridor.
- Unlock the door to the right with the Keycard and take the Empty Handgun from the room.
- Go through the door to the south and read the Scientific Book. The Entrance Key will fall out. Take this and the Empty Bottle from the table and exit through the door on the other side of the room.
The Laboratory
- Run through the courtyard and enter the building to the southwest.
- Cross through the lobby to enter the laboratory core.
- Unlock the first door on the north side with the Keycard and take the Level 2 Keycard from the corpse inside.
- Enter the door on the opposite side of the core and read the Handwritten Notes for instructions on how to calibrate the terminals. (note: the calibration codes are encrypted and must be unscrambled first. Switch the letters for their numeric counterparts to get the codes. Enter the codes into the terminals designated by the first digit in each code)
- Exit the laboratory and cross through the courtyard back to the Main Building.
- Do not enter the Main Building, but instead follow the path to the east.
- Unlock the first door you encounter with the Level 2 Keycard, read the Keeper’s Journal inside to obtain 136 as the unlock code for the armoury.
- Take the Ammunition from the shelf and then exit the room.
- Return to the Pharmacy where you mixed the MHL-3 Acid and fill the Empty Bottle with leftover acid at the mixing set.
- Return to the Underground and unlock the remaining two doors with the Level 2 Keycard and take a Laboratory Key from each room (note: the cell in the maximum security room can be unlocked by entering Clouds as the unlock code)
- Return to the laboratory core and enter the second door on the north side of the corridor.
- Use the Handgun to blow open the gasoline soaked gate, then use the control panel to unlock the Experiment Room.
- Return to the core and enter the final door on the north side, emerging in the Experiment Room.
- After the cutscene, cross to the door at the northern end of the room and use the Laboratory Keys to unlock it.
- Use the MHL-3 Acid to burn open the storage cupboard and take the Plasma Cannon.
- Return to the Experiment Room and fight the boss. (note: to defeat the monster, you must avoid it until the timer runs out — then strike it with the Plasma Cannon. This must be done three times to win the fight)
- After the following cutscene, you’ll receive the Admin’s Keycard.
- Exit the laboratory and return to the Main Building. Follow the path to the east again, this time to the very end, enter the corridor and then go through the door immediately to the south.
- Use the Admin’s Keycard to activate the unlock terminal and then to open the storage locker, and take the Atomic Destabilisers from within. (note: to get the unlock code, select the “latest updates” option and note all the numbers that have numbers half their value on either side; for example 242, you would note 4.)
- Return to the Experiment Room in the laboratory and, after the cutscene, step into the teleporter.
The Other Side Of The Merge
Retrieve the Crystal from the glowing sculpture, then exit through the door to the south- Follow the chasm south and enter the first door to the east.
- Read the riddle on the Carved Obelisk and note it for a later puzzle.
- Return to the chasm and continue to the south, entering through the door at the end into a large antechamber.
- Run through the antechamber and enter the door to the east, taking a second Crystal from the room inside.
- Return to the antechamber and go through the door to the south, emerging in the Statue Room.
- Approach the five statues and use the riddle from earlier to determine which ones to insert the Crystals into. (note: you will die if you select the wrong statues; insert the Crystals into the Dragon and Alchemist statues to proceed safely)
- Pull the lever to the south and enter through the door that opens into the Atrium.
- Choose the eastern fork and follow the chasm to the end.
- Place an Atomic Destabiliser in the centre of the room and return to the atrium.
- After the cutscene, fight the final boss (note: the method of fighting this boss is the same as the one used for the previous boss).
The Endings
Depending on your actions during the game, you’ll get to see one of four different endings.
Sole Survivor — receive this ending by not saving either Tiffany or Marchani. This is actually the canon ending that leads to One Night: Full Circle.
Colt and Tiffany — achieve this ending by saving Tiffany. To save Tiffany, you must obtain the Antivenom from the Meeting Room in the eastern wing of the Main Building (accessible from the path outside the south entrance) and then choose not to split up in the Atrium.
Colt and Marchani — achieve this ending by saving Marchani. To save Marchani, you must obtain the Photograph by unlocking the desk in his office with the Marchani’s Key and then choose to wait with Marchani after the first boss fight.
Safety — receive this ending by saving both of the supporting characters. This is the best possible ending, and achieving it will reward you with the unlock code for Hard Mode.
##
Next week: One Night 2: The Beyond. Stay tuned!
Edit: as of January 2016, I still haven’t done the walkthroughs for ON2 or Full Circle. They’ll come… one day. In the meantime, check out one of the many playthroughs on Youtube.


Thank you! Now I can try the ending now! 😀
LikeLike
I’m glad you found it helpful. I’m writing one for The Beyond next.
LikeLike
The Beyond Ultimate edition, right? I don’t know where I could get Gallery key or at least open Gallery room. -_-
LikeLike
Yes, I intend to write a walkthrough for [i]The Beyond[/i] next. For now, to get the Gallery Key, head through the door in the mine shaft save room — you’ll eventually find it in there 🙂
LikeLike
But what I found is Jim’s note. And is it just me or there is a place I can’t go into in mine shaft?
For the Hard Mode of this game, where I could get the password and where I could input the password?
LikeLike
In The Beyond, there is Skull Key that I believe I have to use it twice and there’s a room with nothing that contain inside inside mine shaft. Did I have an error on my game?
LikeLike
Check out the “Games” page on this blog. There’s a link to a video walkthrough there of the latest version. That should help you until I get around to writing an official walkthrough 🙂
LikeLike
Thank you for the information. It really helps me. ^u^
LikeLike